Monday 31 March 2014

make | FRANCE | cassoulet au poisson and french bread

For our final FRENCH make we've created a healthy version of cassoulet!  This is a chicken-lover's version of the classic southern French casserole.  You can include the bird in bone-in legs and thighs and breast meat if you like, but we made ours just with chicken breasts as we don't like legs/wings/thighs/bones in general!


The traditional cassoulet is made with duck confit, which is basically meat braised for ages in a bath of fat before being roasted.  Obviously, this makes for a very rich dish! We've replaced that with some bacon, which still gives a yummy flavour and goes really well with the beans.

As it seems with most French food, the cassoulet's origins are in peasant cooking.  There are stories of cassoulets being extended for years!  Elizabeth David wrote that the tradition is to deglaze the pot of the previous cassoulet before making the next one (which makes a year-old cassoulet sound more appetising!)


Enjoy today!!  
rosinaviolets    x 


Cassoulet au Poisson (White Bean & Chicken Casserole!) 
Makes enough for 6 portions 

2 x cans cannellini beans 
1/2 teaspoon whole cloves 
1 bouquet garni 
2 chicken breasts 
2 chicken legs, drumsticks and thighs separated (or just use 2 more chicken breasts, like we did)
5 cloves of garlic, smooshed 
1 big onion, chopped finely 
250ml chicken stock
2 x cans chopped tomatoes 
fresh breadcrumbs, to top the casserole 

  • Rinse and drain your cannellini beans.  Boil them in a pot with the bouquet garni, cloves and 1 teaspoon of black peppercorns for 10 minutes.  Strain the water away and remove and discard the cloves and peppercorns.  Remove the bouquet garni, but keep it, as you will use it in the next bit.  

  • If you are using drumsticks and thighs, cook them until browned (5 - 7 minutes).  Transfer them to a plate before cutting the chicken breasts into pieces.  Cut the bacon into pieces too.  Cook the onion and garlic in a frying pan, and add the chicken breast pieces and bacon.  Put the drumsticks and thighs back in the pan.  

  • Now add the chicken stock and the two tins of tomatoes.  Put the bouquet garni from the beans into the chicken mixture, bring to the boil and them simmer on the stove for 10 - 15 minutes, letting the broth reduce.  

  • Remove the chicken pieces and bacon to a plate, and reserve the hot tomatoes and stock.  

  • Remove the bouquet garni and throw it away - you're done with it now.  

  • Now you can assemble your cassoulet.  Preheat the oven to 180C.  

  • Use a 1 litre casserole dish.  Put 1/3 of the beans into the bottom of the pot.  Add half the drumsticks, thighs and chopped up breasts.  Add another 1/3 of the beans, and top with the remaining meat.  Finish off with the final 1/3 beans.  Pour about 250ml tomatoes and stock mixture over the top of the casserole.  Sprinkle breadcrumbs, salt and pepper over the top of the casserole dish and put it in the oven.  Make sure you cover it with foil for the first 25 minutes of cooking, and then increase the heat to 200C for about 5 minutes until the breadcrumbs brown.  

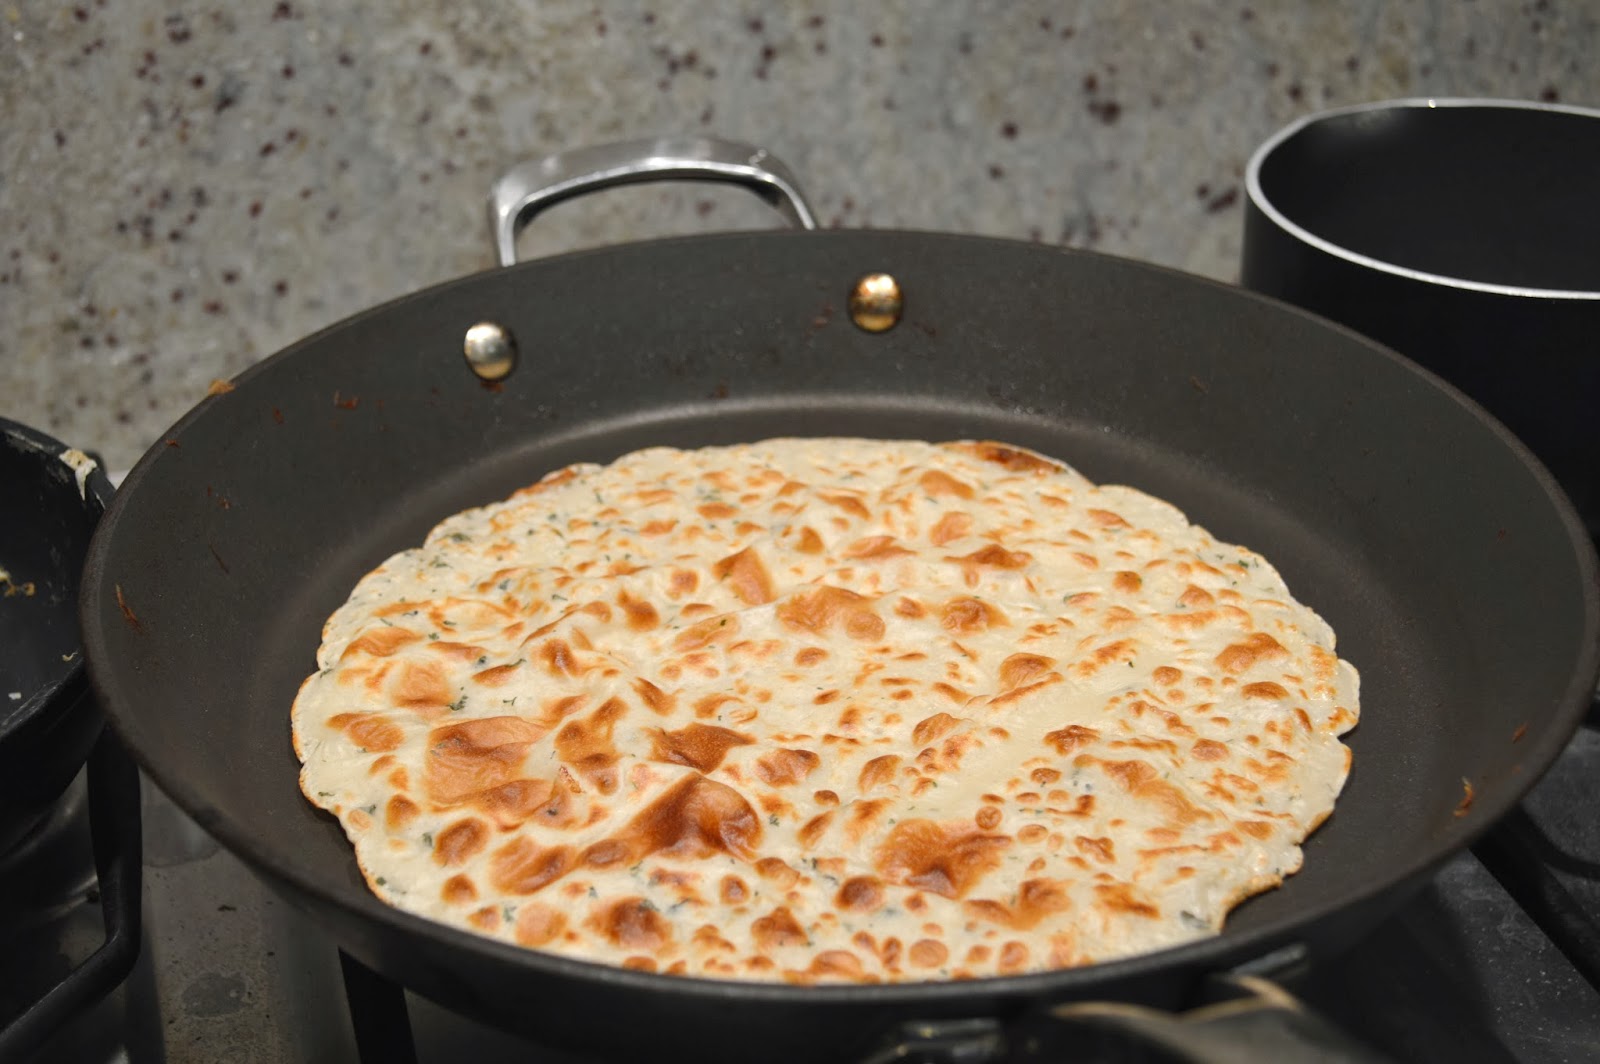
  • Let the cassoulet stand for about 10 minutes before serving with vegetables and French bread (see our recipe below!) 


French Bread 
We didn't make any this week, but this is our recipe for french bread - try it - it's not as hard as you think and tastes amazing!  It's done in about three hours, and this recipe will make two loaves.  

550g strong white bread flour 
2 teaspoons active quick-rising yeast
2 teaspoons salt 
375ml warm water

  • Keep back 50g bread flour, but put the 300g remaining in a mixing bowl.  

  • Put the yeast down one side of the bowl and the salt on the other side.  Pour in the warm water and mix until the dough comes together.  The dough should leave the bowl clean but be a little sticky on the bottom of the bowl.  If it's too wet, you can add more flour about a tablespoon at a time.  Likewise with the water.  

  • Let the dough rest for 5 minutes before kneading.  This short amount of time gives the gluten time to relax.  

  • Take the dough out of the bowl and put it on a clean counter.  Knead the dough, incorporating the 50g reserved flour, and using it to dust the surface of the counter.  Knead the dough until it's really satiny and smooth.  This should take about 5 minutes.  

  • Put the ball of dough into a mixing bowl that you've lightly oiled.  Cover the bowl with cling film and put it somewhere warm to sit for about 1 hour and 30 minutes.  This is the prime rising time.  It should double in size.  At the end of the rising time, turn your oven on to 230C.  It's hot! Put your baking sheet into the oven too to warm up.  

  • Once the dough is risen, punch it back down - let's see you get that aggression out!  Make it back into a ball shape.  The dough should give to the pressure of your finger, and then rise back up again slowly.

  • Cut the dough in half to make two loaves.  Pick up one ball and stretch it into a large rectangle.  Fold over the long edges of the dough to the mid-point.  

  • Stretch out the long edges again and fold over once more.  Pinch the long edge shut, and the short sides shut too.  It should look like a long sausage.  It's really important the edges are shut because it will help the yeast rise evenly throughout the loaf.  Otherwise the dough will just go all flat.  Don't knead the dough again!

  • Turn the loaf over so the long edge is underneath.  Cover it with a damp tea towel.  Do the same to the other ball of dough, and then leave both loaves to rest on a chopping board that you've floured well for about half an hour.  

  • After this time, take your sharpest knife and make 3 - 4 shallow slashes diagonally across each loaf, like a baguette that you might buy in the shops.  These cuts allow the steam to escape as the loaf bakes, so it expands evenly whilst baking.  

  • Once you're ready, carefully take the baking tray out of the oven, and place the loaves onto the tray.  Get about 125ml water ready next to the oven.  Put the bread quickly into the oven and throw the water on the floor of the oven, quickly closing the door.  This makes lots of steam.  The steam creates a thin and crunchy crust.  It doesn't damage the oven - professional bakers recommend this to create the steam.  (I mean Paul Hollywood!) Bake the loaves in the oven for about 20 - 25 minutes.  When the loaves are finished, you can tap the bottoms and they will sound hollow.  

  • Take them out of the oven and let them cool before cutting.  If you can wait!!! 

Tuesday 25 March 2014

make | FRANCE | boeuf bourguignon

This week's recipe comes courtesy of Mum! She's a master at what at home is just called 'beef stew' but if we've got people over we posh-ify it (aka French-ify it!) and call it beef bourguignon.  (Don't tell!)

Mum's recipe is based on the traditional French recipe though - the meat is still braised in red wine and stock, and the shallots and mushrooms added towards the end of the cooking time.  Mum doesn't use bacon though, although you could do if you wanted a richer dish at the end, or you didn't have enough beef.


As with lots of famous French recipes, the dish was originally peasant food.  As with our coq au vin recipe, the meat was simmered in the wine for a long time to make it tender.  The affordable meat would inevitably have been from a tougher cut.  

Mum tends to make everything in big batches so she's got another meal leftover that we can eat again in the week if we're busy or freeze and use again.  Her recipe makes about 8 portions.


Mum tends to make her stew in the morning, and then leave it in the oven for ages on a low temperature, or use the slow cooker.  That way, whatever meat you can afford will be really soft by the time you come to eat it.  It's also important to keep the shallots as whole as possible, because they go all yummy and caramelised and sweet when they're cooked through.  In my opinion they're the best bit!

Anyway, Mum hopes you like her recipe!

Enjoy today!!

rosinaviolets    x


Boeuf Bourguignon
Makes 8 portions

1.5kg beef - Mum used frying steak for this recipe.  Cut the beef into strips and trim it of any visible fat.
1 red onion, finely chopped
5 cloves garlic, finely chopped with the onion
2 sticks of celery, diced
3 carrots, diced
3 bay leaves
2 teaspoons dried thyme
1/2 teaspoon, or more or less to taste, ground white pepper
2 tablespoons plain flour
450g shallots, peeled and topped & tailed (we used echalion shallots) (also called banana shallots because of their shape!)
400 - 500g button mushrooms, wiped clean and halved (you can really use as many as you want - increase the quantity if you haven't got as much meat)
1 tomato, diced
1/2 bottle of red wine
500ml beef or mushroom stock


  • Preheat your oven to 160C.  

  • In a large frying pan (we tend to use something like a wok), heat a little oil.  Cook the red onion, garlic, celery and carrots for about 5 minutes.  

  • Meanwhile, in another pan cook the beef.  (Mum doesn't use any oil when she is cooking beef, as it's already got enough fat in it that it won't stick.  If it does start to stick, just add a splash of water).  Once the beef is cooked, remove it to a plate.  

  • To the first pan with the vegetables, add half the bottle of red wine.  Now throw in your bay leaves, dried thyme and white pepper, to taste.  Cook for another 5 minutes or so, and bring to the boil. 

  • Put the 2 tablespoons of flour into the vegetable and wine mixture.  Stir it up to incorporate and then turn the heat down to low.  Cook for another 5 minutes.  

  • Add the beef to the pan, along with the shallots, mushrooms and tomato.  

  • Pour in the stock (it will be very liquidy but don't worry, once it's had it's time in the oven it will reduce down).  

  • Put the mixture into a large ovenproof dish and cover with foil.  Put into the oven for anything up to 4 hours.  Keep an eye on it - you don't want it to get dry.  Alternatively, put the mixture into the slow cooker for a similar amount of time.  

  • Serve with green vegetables and either rice or boiled new potatoes. 

Saturday 22 March 2014

wear | new styles

We went out for a family trip into London and decided to share our outfits of the day with you! We've been loving the sporty look on Pinterest recently - I was inspired and bought myself a pair of black trainers to try it out.  Since then, I've been wearing them all the time! They are so comfortable and work with just about anything.  A pair of trainers work really well to tone down a smart outfit and add that bit of cool you're looking for to your outfit.  They seem to make it look like you've not tried too hard.

Scarf: gift, Leather Jacket: Miss Selfridge, Bag: Next, Jeans: H&M,
Trainers: Primark


I am also a big fan of hoop earrings.  They're simple and minimalist, but they add a nice decorative touch. Depending on your face shape, you might prefer necklaces or earrings, but we tend to do one or the other, never both.  I started loving hoop earrings a couple of years ago when I was inspired by my cousin Becky (shout out to the Floridians!) who gave me a couple of silver pairs from Forever 21 that I am completely addicted to.  They are just the right size and look really classy.  


Sarah's having some beanie loving action going on! She does look wonderful in all hats though (Emily writing here!)  A beanie does the same thing a pair of trainers does - it adds effortless cool to your outfit.  Sometimes you can be wearing a really plain outfit, and adding a hat just completes the look and makes your outfit work together.  

Beanie: Primark, Jumper: Men's at Primark, Coat: Zara, Bag: Kipling,
Boots: Next


Sarah also loves rings! (I do too, but I can't wear them because my fingers are weirdly shaped - bigger in the middle and smaller at the bottom so rings just don't fit).  These two are particularly valued finds.  The starfish ring is from H&M, and Sarah wore it to her school prom last year.  It's a great example of how jewellery can be dressed up or down.  It also goes really well with the colour of the other ring, which Sarah found at a vintage fair a couple of months ago.  These kinds of places are great for getting really unique pieces of jewellery or clothes for not too much money.  


The jumper Sarah's wearing was found in the men's section of Primark!  And it was on sale!  Literally the biggest bargain you will ever find.  £5 for a totally warm and versatile jumper.  We both love the funnel neck and the colour.  Take a look at the men's section - you might be missing out on some great finds!

Hope you have a wonderful weekend everyone!

Enjoy today!!

- rosinaviolets    x

Saturday 15 March 2014

make | FRANCE | coq au vin

So, what do you make when you fancy something that tastes like it's been bubbling away on the stove all day, but it's already four o'clock in the afternoon?  Our version of coq au vin, that's what! This is a mega quick recipe that calls for normal ingredients that you'll find in your store cupboards and fridges.  And the booze cabinet, of course.


Don't worry, the alcohol you use in cooking evaporates, so you're safe to serve this to any kids!  All you're left with is a rich and slightly sweet taste.  But, because this is a quite a quick cooking dish, if you're at all unsure, you can use the same amount of stock instead, or a non-alcoholic wine.


Coq au vin is traditionally made with a 'coq', which is not a chicken, but a rooster! It was a French peasant food - farmers would make do with what they had around.  It originally called for red wine, which, rather than being used to give flavour, was actually to help break down the tough old meat of the rooster.

We used white wine in this recipe, mainly because our family don't like red all that much and there wasn't any in the cabinet!  If you've got red wine you can use it instead, but it will make the dish quite a bit richer. Perhaps use 200ml wine and 350ml stock instead.  It's all down to personal preference.


We love using Chantenay carrots in cooking.  They cook quickly and you don't even need to peel them, just top and tail and give them a thorough wash.  They've got a lovely sweet flavour too - they'd be great in a juice actually.

Chantenay carrots, surprise surprise, originate from the Chantenay region of France.  They grew out of favour from the 1960's onwards, but they have recently been revived.  They're not too expensive - we got a 500g bag in Lidl for £1!

Chantenay carrots have, like all carrots, a lot of beta carotene, which the body converts into Vitamin A.  Vitamin A acts as an antioxidant, helping to prevent degenerative disease.  An 80g portion contains more than the RDA of Vitamin A.  The old wives' tale that carrots help you see in the dark is not wholly untrue - night blindness is a symptom of Vitamin A deficiency.


Speaking of Lidl, I would seriously recommend having a look around there! There are lots of food snobs out there who wouldn't dare step foot inside a branch of Lidl, but they're missing out on some great bargains!  Head to the fruit and vegetables, where you can get lots of great fresh produce.  They also have very inexpensive meat, and in the tinned section you can get lots of good tins of tuna, mackerel and sardines.

In a slightly naughtier vein, the chocolate is really very good! I would imagine it's because it's a European shop - so they get all the good chocolate from places like Belgium.  At Christmas, they do the most amazing gingerbread too.


I had to get a picture of the tomato puree in here! I LOVE tomato puree.  I think it adds a wonderful rich tomato flavour to most dishes, and it's really good for you too.  Concentrated tomatoes!  Tomatoes are a great anti-carcinogen, and the chemicals that are the best for you actually intensify when they are cooked.  I probably eat at least 5 cherry tomatoes most days.  I also love putting tomato puree on bread as a spread.  It goes very nicely in a ham salad sandwich, or on toast with a little piece of cheese.  

Anyway, I will give you the recipe for our quick coq au vin now.  It only takes about half an hour to make, but you can leave it in the slow cooker for a while until you want to serve it - that's what we did.

Enjoy today!!

- rosinaviolets    x


Coq au vin
Serves 4, with leftovers

4 chicken breasts, chopped into chunks.
250g Chantenay carrots, topped, tailed and washed.  If your carrots are a bit big, you can cut them in half.
300g button mushrooms, wiped or washed clean and cut in half if they are a bit big.
450g round shallots, peeled and cut in half if they are a bit big.
Bear in mind you want the vegetables to be quite rustic looking, so don't cut them too small.
2 cloves garlic, smooshed.
1 1/2 teaspoons dried rosemary.
1 1/2 teaspoons dried thyme.
300ml vegetable or chicken stock.
1 1/2 tablespoons tomato puree.
250ml white wine.
Fresh parsley, to serve.


  • Chop up the chicken into big-ish chunks. Put them in an oven-proof dish and fill it up with water.  Preheat the oven to 180C and poach the chicken in the oven for 30 minutes.  It won't look good, I know, but it keeps the chicken moist and makes it taste like it's been cooking for a long time in liquid. And it'll look much better once it gets in the rest of the stew! 

  • Prepare the carrots and place them in a saucepan of boiling water to cook for about 6 minutes.  

  • While the carrots are cooking, heat a big and deep frying pan with a little oil in it.  Cook the button mushrooms, garlic, rosemary and thyme until they're a nice colour, and smell good.  

  • Now add the shallots, and cook for another five or so minutes.

  • Add the wine to the pan and increase the heat.  Once the wine boils, add the stock and tomato puree.

  • Add the chicken to the pan and cook for about 5 minutes.  

  • Transfer to a slow cooker, or serve sprinkled with parsley, with boiled new potatoes and your favourite green vegetable.  
Alternatively, you can follow the traditional French route and make this into more of a Sunday dish, by roasting a chicken first, cutting it up into pieces and adding these to the rest of the mixture instead of the chicken breasts.  Whatever takes your fancy! 

Sunday 9 March 2014

make | FRANCE | ratatouille crepes

So... we've been a bit busy during February and we realise we haven't kept up to date on all the things we said we we're going to do.  And we are sorry!  Emily's been working on her final dissertation, which is due on 28th March (ARGH!) and Sarah has been focusing on getting ready to take her AS-Levels.  This weekend we are both going to create beautiful revision charts (aka procrastinate even more than we already have done).

We are also in the process of moving to Wordpress.  We have heard it is a lot better than Blogger, BUT we haven't got a clue how to use it.  And I for one do not know the slightest thing about computer programming and codes etc etc.  I feel I may need to consult my computer-whizz friend Rowena.

Anyway, we have decided that in March we will hit France! Now, a lot of people, when they think France, think lots of cream, cheese, and heavy food.  But that doesn't have to be the case - and besides, everything in moderation!

Our personal French favourites include French baguettes (and any kind of artisan bread, to be honest!) delicious cheeses, particularly the fancy Gruyรจre, which melts a million times better than cheddar, and Roquefort which is a tangy and slightly salty blue, but also the famous Brie and Camembert soft cheeses.

We also regularly use bouquet garni in stews (basically a lot of fresh and dried herbs tied together, or you can buy them in the supermarket in something resembling a tea bag! Remember to take it out before you serve your food!).  Even more regularly used is the humble garlic.  Garlic grown in the Pyrenees is considered some of the best in the world.  All that red and white wine vinegar you use?  That's French too!

Puy lentils, which are really healthy for you, form the basis of a lot of French peasant cooking.  They've got lots of fibre which means they stop your blood sugar from rising too high after your meal (basically, they're low GI).  They also give a lot of B vitamins and protein which means if you're vegetarian, lentils are a real superfood! As a final factor, they've got really high levels of magnesium and folate which are great for your heart.

Our final French hero has got to be prunes! We love them - I know they've got a bit of a bad reputation but if you buy some and try them, they are totally delicious.  They're like sweets.  Agen prunes, which are from, funnily enough, Agen, near Cahors in France are considered the best.  You'll pay a bit more for them but they are so good.  They're great as a topper for porridge, as a snack, in cakes (chop them up and you'll make a wonderful moist fruit cake), or even in savoury stews for a bit of a change.  Scrumptious.

This week, we made a new recipe.  Baked ratatouille crepes! This was a bit of a late pancake day for us.  Our friend Tracey wrote an update on facebook that we didn't see until about 10pm on pancake day evening.  And then we realised... no pancakes for us! So we did them a couple of days later!

Ratatouille, as shown in the picture to the right, (courtesy of BBC Good Food!) is an absolute star of a dish.  We love it on pasta actually, but that's not so French!  We made our recipe for ratatouille and then thought, why not put it in a crepe.  How much more French can you get!?!

Bear in mind, our ratatouille recipe makes quite a lot, but you can make it up, use what you need and then put the rest in the freezer to have another day.

This would be great for a fancy lunch, or a light dinner.  Or you could, instead of serving with bread and salad, serve with bread and the remaining ratatouille!

Enjoy today!!

rosinaviolets    x


We've got to admit, this was not homemade.  Go to Waitrose and pick up the Grand blanc baguette.
Actually amazing.


Ratatouille Crepes

For the Crepes
95g plain flour
1 egg
200ml milk
100ml water
Handful of chives, finely chopped


  • Pour the milk into a measuring jug and top up with water.  

  • Put the flour into a bowl and make a well in the centre.  Break your egg into it.  Use an electric whisk, or if you don't have one a normal whisk, to mix the flour and egg together.  Slowly add the liquid, whisking all the while until you've got a light fluffy batter that's not lumpy at all! Add the chives.

  • Heat your frying pan over a medium-high heat.  Make sure you're using a good non-stick one, and then you won't need too much oil.  We always use spray oil to get the best coverage without using too much.  

  • Spray a couple of sprays of oil into the pan.  Wait a couple of seconds for it to get hot, then ladle 1/4 of the mixture into the pan.  You can try to make four crepes out of this, but if you end up with more, just make more wraps and split them up between the people you're serving! 

  • Wait until the edges become loose and the crepe has solidified, then turn it over.  Cook the other side of the crepe, and then remove to a plate and continue with the rest of the crepes.  


For the Ratatouille 
1 tablespoon dried herbes de Provence 
4 garlic cloves, peeled and smooshed in a pestle and mortar 
2 onions chopped roughly 
2 courgettes chopped into thick-ish rounds
1 aubergine chopped into rough cubes
2 peppers, whatever colours you like, chopped roughly 
2 cans peeled plum tomatoes - drain them and keep the tomatoes but not the juice (unless you want to use it for something else) 
1 tablespoon each of basil and parsley, chopped 

  • Heat a couple of sprays of olive oil in a pan.  Add the garlic, dried herbes de Provence and the onions and cook until smelling really yummy.  

  • Add the rest of the vegetables and increase the heat a little.  Season with salt and pepper.  

  • Put the whole thing in a big ovenproof dish and put it in the oven at 180C for about an hour until the veggies are soft.  You can cover it up if you think it needs it.  

  • Before you serve it, or put it in the crepes! Stir in the chopped basil and parsley.  


To assemble your crepes! 
350g jar pasta sauce! (Sorry - we cheated!) Plain tomato and basil is fine.  
Grated cheese, if liked.  
  • Lay out a crepe on a clean worksurface.  Add some ratatouille to the middle of the crepe, then fold up the edges of the crepe like you're making a wrap. 

  • Put the crepes into an oven proof dish.  Pour over the pasta sauce.  

  • Add pepper and a little grated cheese, if liked.  We used a little parmesan, and then left some on the table so people could add more if they wanted to.  

  • Put into the oven at 180C for approximately 20 - 25 minutes, until hot through and bubbling.  

  • Serve with bread and salad, or the remaining ratatouille.