Sunday 29 September 2013

craft | roman blinds

Making your own curtains may seem like a daunting task, but it's actually not too difficult, and can save you a small fortune.  We had a man come to the house to give us a quote for our two kitchen windows and my bedroom window, and the total came to over £1000! So, I decided I'd have a go at making some blinds instead.

The main difficulty when making Roman blinds is the measuring.  You've got to be spot on, and you've got to get your calculator out.  Once you've done your calculations, making up the blind doesn't need anything other than for you to stitch in a straight line.

The finished Roman blind can be up to 120cm wide, with three cords.  If you want your blind wider, use more cords, and make up the blind in the same way.

Any fabric will do to make your blind, although do think about the thickness to decide on the level of blackout you want.

What you'll need
Blind fabric in the amount needed
Lining fabric in the amount needed
Matching thread
2cm wide Velcro tape, as long as the width of the finished blind
12mm plastic blind-rings, 3 per dowel
Metal cleat, to wrap cords around when the blind is up
2.5cm D-lath, 1cm shorter than the width of the finished blind
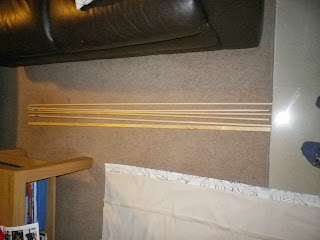
9mm wooden dowels, each the same length as the D-lath, and one per dowel channel
2.5cm x 2.5cm support batten, 5mm shorter than the width of the finished blind
Staple gun
Metal screw eyes
3 nylon blind cords, each twice the length of the finished blind, plus the width of the blind
Blind pull

How to do it
The first thing you've got to do gets all the measuring and maths out of the way.

  • Decide how wide you want your finished blind to be 
    • Decide if you want the blind to fit inside the window recess, or not, and measure the width.  
    • Write this down: this is the finished blind width.  
  • Decide how long you want your finished blind to be 
    • Decide where you are going to put the support batten at the top of the window.  Measure from the top of the batten to where the bottom of the blind should reach.  
    • Write this down: this is the finished blind length.  
  • Make a graph paper scale drawing of the finished blind.
    • To work out how many dowel channels you will need, create a to-scale drawing on a piece of graph paper of your blind.  
    • You need one dowel channel approximately every 30cm, starting from the top of the blind.  Below the last dowel channel, you need to leave 15cm to the bottom edge of the blind.  The distance between the channels can be a bit more or less, but they have to be equal, and the distance below the last channel and the bottom of the blind should be half the distance between the dowels.  Got that?
  • Cut out your fabric 
    • From the blind fabric 
      • Cut a panel of fabric that is as wide as the finished blind width plus 8cm extra, and as long as the desired finished blind length plus 13cm extra.  
    • From the lining fabric 
      • Cut a panel of fabric that is 1cm narrower than the blind fabric panel.  
      • The length of the lining panel is the finished blind length plus 4cm extra for each horizontal dowel channel.  (Once the channels are folded and stitched, the lining will be the exact length of the finished blind.)
  • To make your lining 
    • Press 4cm to the wrong side along each side edge of the lining panel and tack in place.  
    • Mark the dowel positions across the right side of the lining.  This is where accuracy is key - take your time!  Follow the scale drawing, and use a mechanical pencil and metre-ruler.  Draw the first line the distance from the top of the fabric as the first marked dowel position.  Then, draw another line 4cm below this - this is the first channel.  
    • From the second line, measure the distance between the dowel channels, and then draw your next line.  Draw another line 4cm below this - this is the second channel.  
    • Draw the other channels in the same way, with two lines 4cm apart.  
  • To make the dowel channels 
    • With the wrong sides together, fold the lining along the centre of the first dowel channel, so the two marked lines line up.  
    • Press along this, and then pin in place.  Stitch along the marked line.  
    • Stitch the remaining channels in the same way.  
  • To prepare your blind fabric 
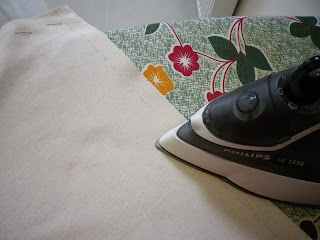
    • Press 4cm to the wrong side along each side edge of the blind fabric.  Pin in place.  
    • Sew these hems in place along the raw edge, using a catch stitch that will be almost invisible on the right side of the blind.  This is what'll take some time, because you've got to do it by hand.  
    • At the bottom of the blind fabric, press 1cm, then 4cm to the wrong side.  
    • At the top of the blind fabric, press 4cm to the wrong side, twice.  
    • The pressed folds show the positions for the top and bottom hems, but don't pin or tack them yet.  Unfold the second fold of the double hem at the top of the blind, so only 4cm is folded to the wrong side.  
    • Pin the soft side of the velcro to the right side of the blind fabric, just above the second pressed foldline so it's sitting on the double layer of fabric.  Stitch it in place all around the edges.  
  • To attach the lining and blind panel 
    • With the top and bottom blind hems unfolded, and with the wrong sides together, lay the lining on top of the blind fabric.  Position the lining so that it is aligned with the hemline fold at the top and the hemline fold at the bottom, then centre it widthways.  Pin and slipstitch the sides of the lining to the blind fabric.  
    • Fold the pressed hems at the top and bottom of the blind over the lining and pin in place.  Slipstitch them in place.  At the top of the blind, slipstitch the sides of the hem together, but at the bottom, leave the sides open so you can put in the D-lath.  
  • To sew on the rings 
    • Refer to your scale drawing, and use your mechanical pencil to mark the three ring positions per dowel channel.  The cords will thread through here.  Mark one ring position in the exact centre of the channel and one 4.5cm from each end.  
    • Hand sew a ring at each of these positions, catching in the pressed channel fold.  
    • Underneath the channels, beneath each position of the ring, do a catch stitch, very tiny, through all the layers of the fabric, so that when you pull up the blind, all the layers come up smoothly together.  
  • To insert the dowels and the D-lath 
    • Slip one dowel into each channel.  Slipstitch the ends to close.  
    • Slip the D-lath into the hem channel at the bottom and slipstitch the ends to close.  
  • To prepare the batten support 
    • Staple the hook section of the velcro to the front of the batten.  Screw three hook eyes to the bottom of the batten, one 5cm from each end and one in the centre.  Add an extra one 2.5cm from the pull-cord end.  
    • Fix a cleat to the architrave on the same side.  
    • Fix the batten to the window.  
  • To thread on the blind cords 
    • Knot one end of each cord onto one of the three rings at the bottom of the blind, then thread the cord up through the other rings to the top.  
    • Stick the blind to the batten, and then thread them through the hook eyes and out at the side you're going to pull the blind up from.  
    • With the blind down, align the cords and attach the blind pull to the ends, trimming the cords to the same length.  
    • Pull up the blind with the joined cord, and secure on the cleat.  
  • Feel amazingly satisfied that you've made your very own Roman blind!  


Wednesday 25 September 2013

make | gourmet: cod with creamy leeks

This week, we're showing you how to make something that looks really showy, but is actually really easy, and not too expensive either!

This was our first foray into using quark - something Emily had read about in a Delia Smith cookery book, but had never really known what to do with.  Quark is a really great substitute for any savoury recipe requiring cream or creme fraiche.  It's a cross between thick yoghurt and soft cheese, a little bit like ricotta.  Look out for different types of quark - get the lean version as it is then virtually fat free but still tastes just as good as ricotta.  It's also only about £1.25 for a 250g tub.

Any kind of white fish will do for this recipe, but if you want to add to the yumminess, you can grill the fish quickly in a griddle pan to get it a bit crispy, before baking it on top of the leeks and potatoes.

Enjoy today!!
- rosinaviolets    x


Cod with Creamy Leeks 
2 leeks, make sure you wash them well, because they can be really dirty inside, sliced 
300g new potatoes, sliced thinly
4 portions of white fish, you can keep costs down if you buy frozen, and something like coley is inexpensive, but will work just as well here.  Just defrost before use. 
100g pack of watercress 
250g tub quark 

  • Preheat your oven to 200C

  • Spray a big frying pan with a little oil, and fry your leeks and potatoes for about 5 minutes.  Season them, and then transfer them to a big baking dish.  Shallow and wide is better than deep and narrow.  

  • Top the leeks with the portions of fish (put them in the griddle pan if you like before hand).  Cook for about 20 - 25 minutes, or until the fish is cooked through.  It will depend on how thick your fillets of fish are.  

  • Meanwhile, use a stick blender to blend together the watercress and quark.  Season it with salt and pepper to taste.  

  • Remove the fish from the oven.  Plate up the fish, and then stir half the watercress mixture into the potatoes and leeks.  Serve next to the fish, and add a dollop of the remaining watercress mixture to the fish.  

  • If you like, you could do some peas on the side - go for the green! 


Sunday 22 September 2013

live | love.

Imagine you are going through a particularly rough time, and one day you receive a bundle of letters, in which are loads of kind thoughts and prayers to you. How would it make you feel? There is a charity right now which does just this! It offers someone the chance to request some love for someone they know is in need, and others the chance to lighten up someone else's day. We find it amazing that organisations like this exist, because it enables us to directly give love to a stranger on the other side of the world! You hear so much about people suffering, but nobody really believes that it is possible to actually help them in any way.  Now, a small number of those people can be helped - by you!

The charity is internet-based, run by Hannah Brencher, who began a blog as a way of sending personalised love letters to people who gave her an email address. The website has since bloomed.


Emily found the website last year and was completely entranced by the idea, eager to get a hold of her pen and paper and write to someone. The idea completely had me hooked too, and we decided we would start writing to others to make them feel a bit better about life. It's completely free to take part, all you have to do is just put your email address in, and you're done! A new collection of love letter requests come out every month, and it's up to you to choose which person you would like to write to. Emily and I will tell you, it is the best feeling to know you're helping someone else out in some way or another. 

Please join us in sending a little bit of love to someone, somewhere! 

Enjoy today!! 
- rosinaviolets    x

Wednesday 18 September 2013

make | punchy pasta : penne arrabbiata (+ get your greens!)

It's getting lots colder in the land of Inghilterra (that's England in Italian, if you didn't know ;) ), so we wanted to make something this week that would fill us up, but still had some exciting flavours.

Pasta is pretty popular, and it's super cheap too! This was a use-up-what's-left-in-the-fridge dish, again, so if you have some greens, and some bacon in your fridge, a can of tomatoes, an onion, chilli flakes and some paprika in your cupboard, then you're pretty much good to go! Our Dad was a bit sceptical when we said we were making spicy pasta (with greens) (*we put the brackets in there to indicate we had to say that a little under our breath*) and to be fair, who knew this would work so well!? The sweetness of the greens is really brought out by slow simmering the tomatoes, and the addition of the smoky paprika, bacon and the spicy chilli just tastes great!

Another great thing to bear in mind is that when you eat this, you're not just getting carbohydrates, you've got your veg in there, and some protein too.  If you want to make this healthier, just use wholewheat pasta.  We used up a savoy cabbage, which tasted really nice, but it would be great with kale which is so very healthy for you! Green leafy vegetables are really good for you because they've just got so much fibre, along with lots of vitamins and minerals.  Kale and greens are really good because they have vitamins A, C and K, folate and potassium, as well as calcium.  Kale would probably even better than savoy cabbage in this recipe because it cooks much quicker.  Just make sure that whatever greens you use, you wash them well with lots of water because they do tend to hold onto dirt.

Once we cooked this pasta, we won our Dad over, and he said we had to put the recipe up on the blog.  So we hope you enjoy it too!

Enjoy today!!
- rosinaviolets    x


Penne Arrabbiata with Bacon & Greens
Serves 4

300g penne pasta
200g bacon (we used leftovers from a big ham we had boiled)
200g greens of your choice (shredded kale would be best)
1 onion, chopped finely
1 clove of garlic, chopped finely
1 400g tin of peeled plum tomatoes (or chopped tomatoes if that's all you have)
1 tsp agave nectar (makes your tomatoes really sing)
1 tsp (or more, or less, to taste) chilli flakes
1 tsp smoked paprika
pinch Maldon sea salt


  • Get your two pots of water boiling, one for the pasta (as below), and one just plain for your vegetables.  TIP: When you cook pasta, you don't need any oil in the water so long it's on a really rolling boil, and it's salted.  It won't stick.  Don't worry, in this recipe you're not using the pasta water, so you're not eating the salt.  

  • When the water's really hot, bung in your pasta.  Check the label to see how long it takes to cook, and then subtract a couple of minutes - you want it to be al dente, and it will cook in the residual heat of the sauce.  Set a timer to this length of time.  

  • In the other pot of hot water, put your shredded kale (we also had half a courgette we wanted to use up, so we cubed that and put that in there as well).  

  • Spritz a big pan with some oil and get it hot.  Fry (steam-fry if it starts to stick) your onion and garlic.  Stir in the spices and the bacon. 

  • Once the bacon is cooked (if you're using raw bacon), throw in the tin of peeled plum tomatoes and use the back of the spoon to squash them down.  Turn the heat up a bit so it's bubbling away, and then add in your agave nectar.  If you have time, you could make the sauce in advance as the tomatoes will have time to really get yummy and reduce. 

  • When your timer goes off, quickly strain the pasta and add it to the big pan of sauce.  Then strain your vegetables and add them too.  Stir together and quickly serve on hot plates with lots of black pepper. 

Friday 13 September 2013

live | nature's bounty: wild fruit picking

Hi there!

It's harvest time! Not sure if you've seen any of the BBC programmes at the moment on this year's harvest, but last night, as the family were out getting Sarah's GCSE certificates (WELL DONE my fabulously clever sister!) I was eating dinner and decided to be a bit of a slob at watch TV at the same time.  Turned out, what was on TV was really interesting!  This programme followed a cereal farmer and looked at the way wheat and oil seed rape are farmed in the UK.  Our weather this year has meant that our wheat crop hasn't done too well, and for the second year running we're going to be net importers of this staple grain.  Bad news for the environment and for our pockets because the further our food travels the more carbon emissions and the more the price increases!

The programme also focused on oil seed rape, which is a really interesting plant.  In all seeds, there is a food store, designed to last until the plant shoot breaks the surface of the ground and starts photosynthesising and therefore making it's own food.  In wheat, that food store is mainly carbohydrate, with some protein.  In oil seed rape, the food store is fat.  So when we press the rape seeds, we get oil!  I knew rapeseed oil was pretty good for you, but I didn't know that it is actually better for you than olive oil!  It's got lots less saturated fat, and it also heats to a really high temperature without burning.  If you buy cold-pressed rapeseed oil, you can use it for salad dressings as well as for cooking with! And, what's more, you'll be championing our British farmers.

The programme was really interesting, and if you've got a free hour, I highly recommend you watch it here.

Talking of harvest really reminded me of the fruits we've been picking lately.  Have a look around you on your next walk because nature's bounty really is there for the taking right now! (Make sure you're not picking in someone else's garden though!!)  The other day, the family took a day out to Windsor.  As we were walking along the river bank we noticed a huge length of bramble bushes, with a veritable fortune's worth of blackberries.  Now, we love a good blackberry, but they are so expensive to buy in the shops.  Who can afford £3 per punnet! So, when we see them growing wild, we tend to go a bit crazy.  We filled a whole bag full of blackberries.  We didn't let the stinging nettles stop us! All four of us came away with arms scratched and stinging, but mouths stained purple and feeling very happy.


We boiled them with a tiny bit of water,
a dollop of honey & some apples.  Yum!

A couple of days later, our lovely next door neighbour Margaret came over with lots of her apples.  She's got a wonderful cooking apple tree in her back garden, and she had so many she couldn't think of what to do with them, so she very generously gave some to us.  They were delicious! I'm feeling the gratitude right now.


We cooked these beauties with hardly any water,
another dollop of honey, a sprinkle of mixed spice
and a handful of raisins, until there were some still firm
pieces and some gloopy bits.  So.  Delish.
Try it with natural yoghurt :)

So wherever you are, look out for what nature is offering you!  I'd really love to find some wild gooseberries. We've been enjoying some of Waitrose's gooseberry jam at the moment on toast (whole gooseberries in there!) it's a really delicious treat.  Another thing I really love is a damson.  Our Aunty Jackie makes the most fantastic damson jam ever.  It tastes so delicious, and different to your typical shop bought jam.  I'd love to make some jam myself but our plum tree is looking a little sad and rather bereft of fruit after the gardeners chopped it back prematurely! Ah well, we will have to make do with what we can find on our walks.  There's so much out there!  

Let us know what you've been doing with your wild finds!! We'd love to hear from you! 

Enjoy today!! 
- rosinaviolets    x  

Thursday 12 September 2013

make | better late than never(!): butternut squash burritos

I realise this update is really very late & I apologise! I don't even have any real reason for it being so late - except I kept forgetting, and I kept worrying about going back to Uni.  Only two weeks! Eek!  Also, having a look at my Uni timetable, I think it's unlikely I'll be able to keep Tuesday as my update day - I think we will be moving to Wednesday, starting from next week! :)

Anyway, when we did evenutally manage to get round to our make of the week, we wanted to try something a bit different.  Your typical burrito comprises a big tortilla wrapped around rice, refried beans, mince, salsa, guacamole, maybe some sour cream if you're living in America, and maybe some cheese.  They can be really yummy, don't get us wrong, but our mission of the week was to create a burrito that was just as good as this, but using the ingredients we had left in the fridge.  Cue butternut squash bought for a stew and not used!

By chance, our burrito recipe could be really easily made vegan friendly - just leave out the cheese (or substitute with vegan cheese).  

Butternut squash is actually a very versatile vegetable - we love it's delicious sweet flesh in stews for thickening, or in a delicious soup, and just roasted to top a salad.  There's loads of stuff you can do with it.  It's also really good for you.  It's beautiful golden colour is there to highlight it's high levels of beta-carotene, which is an anti-carcinogen.  What's more, when you eat something high in beta-carotene, you automatically turn it into Vitamin A, which is really good for your eyes.  That's where the saying comes from: carrots really do help you see in the dark!! Squash is also a great source of Vitamin C - 1 serving gives you 50% of your RDA.  

Anyway, enough of us extolling the health virtues of butternut squash, and to the recipe!

Enjoy today!! 
- rosinaviolets    x


Butternut Squash Burritos 

Makes enough to feed 4 hungry people + leftovers for lunch the next day! Yummy in a wrap cold, or to top your salad.  

100g dry brown basmati rice 
1 onion, chopped 
2 cloves of garlic, finely minced
1 orange pepper, chopped
2 medium sized carrots, chopped
2 teaspoons cumin seeds 
1/2 teaspoon (or more or less to taste) chilli flakes 
1/2 teaspoon turmeric
1 normal sized can of whatever beans you have / like (we used borlotti, simply because that's what we had in the store cupboard!  It'd work well with anything though - kidney beans are really popular and would be great, or you could use black eyed beans... the choice is yours!) 
1 butternut squash, cubed and roasted
4 big tortilla wraps 

Toppings to serve: cherry tomato salsa (homemade: chop your cherry tomatoes, add lime juice, coriander, black pepper and some chopped red onion if you have any - easy!), avocado, grated cheese, salad etc...

  • Roast your butternut squash.  Get your oven quite hot (200 degrees C) and cover a roasting tin in tin foil.  Cut the skin off the butternut squash, and cube it.  (This does require some effort - those squashes are really hard!!)  Put it in the tin, spray with a little olive oil and sprinkle with black pepper and a little Maldon sea salt.  Roast for 30 minutes.  

  • In the meantime, you can cook your brown rice.  It normally takes about 25 minutes, but follow the directions on the back of your packet. 

  • After all this is done, put the onion and garlic into a big pan, with a spray of olive oil.  Cook these for about 5 minutes, and then add in the cumin, chilli flakes and turmeric.  

  • Now you can add the orange pepper, carrot, rice and beans.  Cook for another 10 minutes.  If the pan starts sticking, keep adding splashes of water so you steam fry your veggies.  Give it all a whiff - it should be smelling really good by now! 

  • Add your squash to the pan, and squash it all down with the back of your wooden spoon.  

  • Put everything on the table in big bowls and let everyone dig in.  Yum! 

Friday 6 September 2013

live | sharing our passions

A couple of weeks ago, we heard news that someone had made one of our recipes.  This was so very exciting, and really made both of our days!

Rowena's sister Tracey made our Paneer Biryani and then, a few weeks later, our Oaty Raisin Cookies.  Then today, I logged onto facebook and she had made the Red Pepper and Cherry Tomato Filo Parcels. They look like they turned out great! Here are the pictures:


I can't tell you how amazing it is to see that something you're really excited about has brought a little bit of happiness to someone else.  Thank you Tracey!!

So, our homework for all of you is to share something you love with someone else.  Even if you think it's a bit quirky - tell someone about it - often, people are more interested than you think they're going to be.  If you help someone else feel as good as you do, then you've done something great.

Enjoy today!!
- rosinaviolets    x

Monday 2 September 2013

make | thai style: chicken burgers!

We love stuff that comes in bread, and the weather's been really good lately, so we thought, why not make something that we could barbeque for our make this week!  We didn't actually end up barbequeing our chicken burgers, but they worked just as well in the grill pan, which means we have an excuse to eat them even when it's cold out!

These chicken burgers are simply packed with flavour, so much so that they even got the approval of our Dad, who, like most men, does like a bit of red meat.  They stay tender, and don't get dry, and are so tasty you don't even need a sauce with them, although a tomato relish would go great.  

Our secret weapon in this recipe is fish sauce.  Now, you might think, "What are you doing getting fish sauce all up in there with that chicken?", but it doesn't have a distinctively fishy taste at all!  It's actually made out of just anchovies, salt and sugar, and gives a really yummy savoury flavour to oriental cooking.  Don't skimp on it, even if you don't like anchovies - it doesn't taste like anchovies!  It just makes these chicken burgers delish :) 

We served our burgers with stir fried greens (we couldn't find baby pak choi in our local supermarket, but if you've got some, split it down the middle, steam it, and then stir fry it gently in some soy sauce, garlic and a splish of fish sauce, and you've got a beautiful and delicious (as well as very healthy!) side dish.  We also made roasted sesame carrots, the recipe for which comes below.  

Enjoy today!! 
- rosinaviolets    x


Chicken Burgers (Thai style) with Sesame Carrots

Makes 4 burgers

400g chicken breasts
2 cloves of garlic, very finely minced or chopped
1 red or yellow onion, very finely chopped
handful of coriander, finely chopped
1 red chilli, deseeded and very finely chopped (or more, or less, depending on how hot you like things)
2 teaspoons fish sauce
freshly ground black pepper & coarse sea salt
4 baps for the burgers to go in, toasted if you like.

4 big carrots cut into matchsticks
2 teaspoons of finely chopped fresh ginger
coarse sea salt
soy sauce
1 tablespoon toasted black sesame seeds
olive oil


For the carrots
  • Heat a dash of olive oil in a frying pan, and fry the ginger until it starts smelling good (about 30 seconds).  

  • Add the carrots and stir to combine.  Add a little pinch of salt, and about 60ml of water.  Turn the heat down to medium.  Cook until the water evaporates and the carrots start to soften, about 5 minutes.  

  • Stir in the soy sauce and sesame seeds.  Serve!


For the burgers
  • Chop up the chicken breasts, and use your food processor to whizz the chicken into a mince.  

  • Mix it all up with the garlic, onion, coriander, chilli, fish sauce, salt and pepper. 

  • Form the mixture into 4 burgers, about 2cm thick.  

  • Heat a grill pan over a medium heat, and spray a little olive oil on it. 

  • Grill each burger for about 8 minutes on the first side, and then 5 minutes on the second.  They should be nicely marked and firm to the touch.  

  • Put them in a toasted bap and serve with stir fried greens and sesame carrots!