Sunday 26 January 2014

make | MOROCCO | mini chicken pastillas

A pastilla is a traditional Moroccan filo pastry pie that combines sweet and savoury flavours.  It's traditionally made with pigeon, but as that's a bit tricky to get at your local Tesco, we've gone for what it's more often made with these days - chicken.  Basically you get the sweet and savoury flavours going by slow cooking the chicken in a spiced marinade, and then you add raisins and crunchy flaked almonds before closing up the pie.
A traditional pastilla will cook the meat a day ahead and then make a custard-like thick sauce from onions and eggs to pour over the chicken.  Rather than do this, we thought we'd lighten the recipe up, and make it a bit more do-able for an everyday meal.  We also couldn't help adding in a few veg!  We think it works really well - and is a different take on our red pepper and cherry tomato filo parcels from August last year.  To finish your pastilla, dust it with a little cinnamon and icing sugar.  We served ours with some green veggies on the side.

You can make individual pastillas, like we did, or you can make one big one, which is a more traditional way of serving it.  If you want to do that, still use the filo pastry, but take a round cake tin and line it with greaseproof paper first.  Then take a kitchen roll dipped in olive oil and lightly grease the paper.  Line the bottom of the tin with the pastry, fill it up and then fold the leaves of pastry over to close the top.  Give it a wash of milk, and then bake it for 20 minutes in the oven at 190C.  If you want, you can then take it out of the oven, and turn it over and bake it for a further 20 minutes.  It'll get crispy all over then!

This week we have also enjoyed some absolutely beautiful Moroccan clementines! We picked them up at a market near home, and they are so pretty and taste delicious too.  We couldn't resist taking a picture to show you.

Enjoy today!!

- rosinaviolets    x

We forgot to take a picture of the ingredients, so
a mid-cooking picture will have to do!


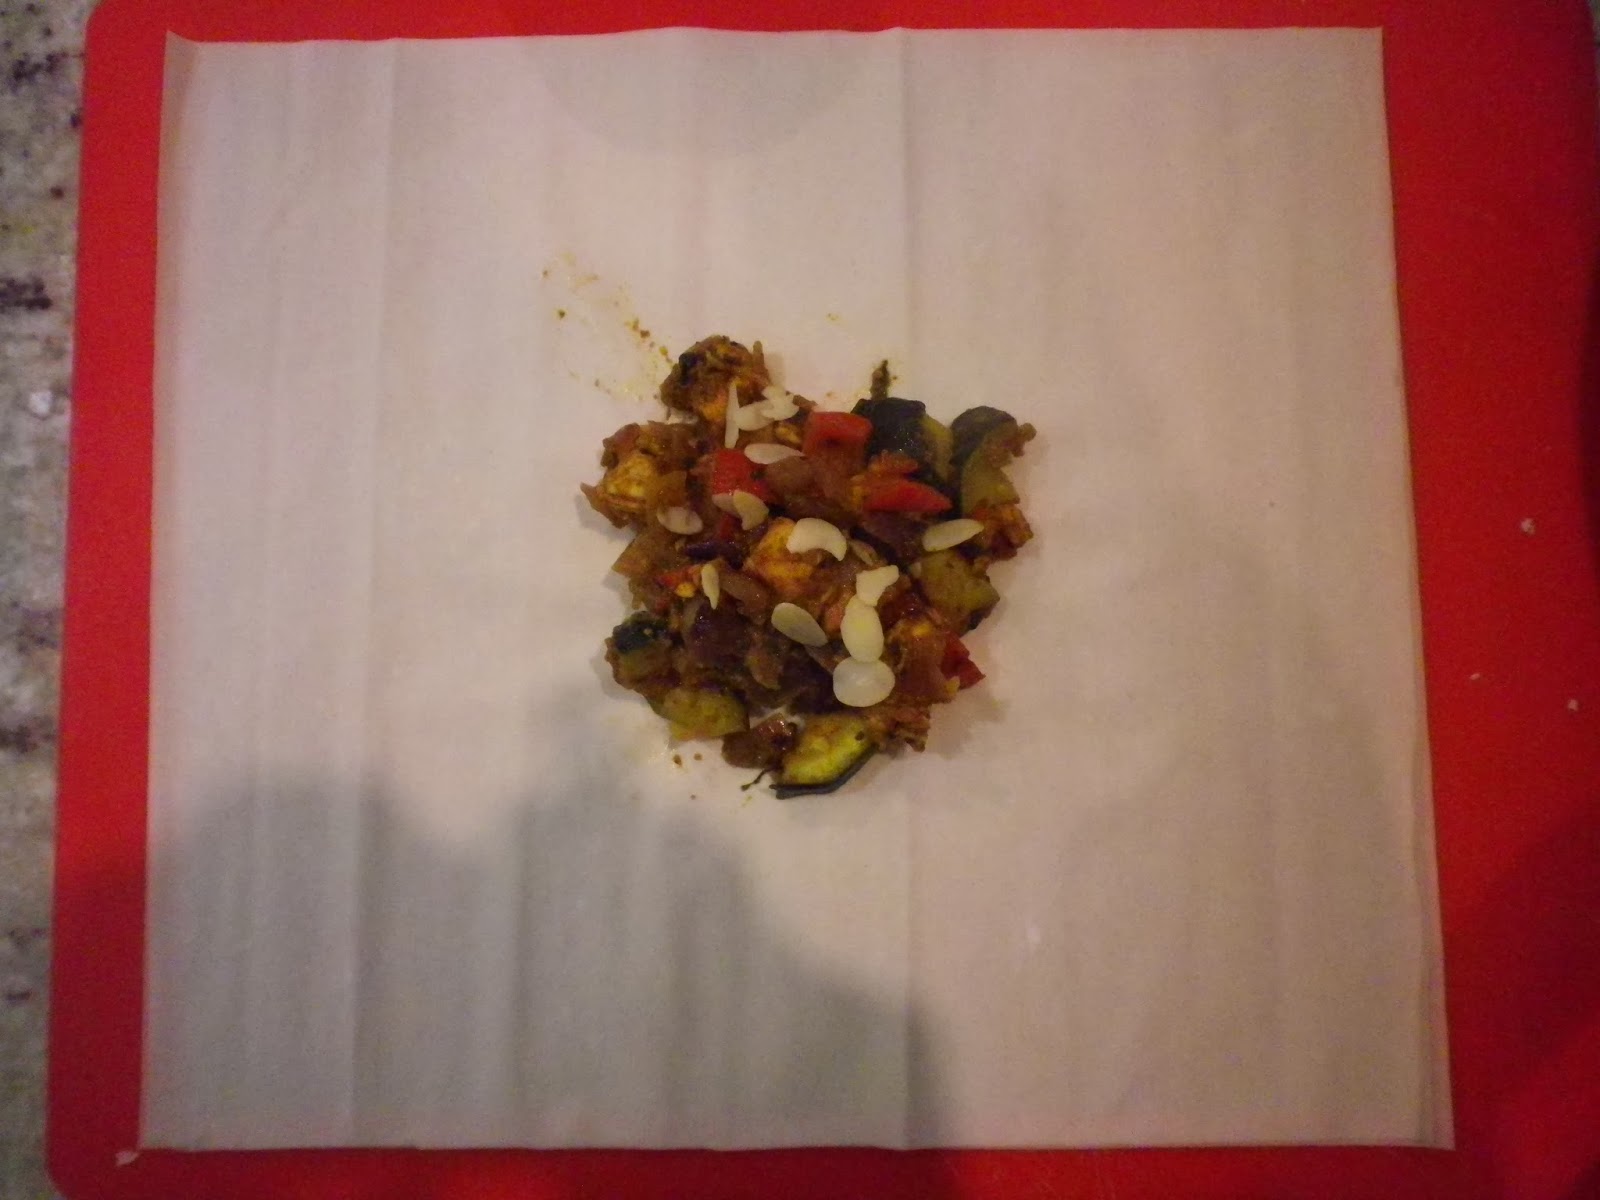
Mid fill - you can add a bit more filling to yours than this


Aren't they gorgeous!
Mini Chicken Pastillas 
To feed 6 (makes 6 mini pastillas) 

For the chicken 
3 chicken breasts, chopped into chunks
2 tablespoons tomato puree 
1 teaspoon ground ginger 
1 teaspoon ground turmeric 
1 teaspoon paprika 
1 teaspoon cinnamon 
1/2 teaspoon (or more, or less to taste) chilli flakes 
1 dessertspoon honey 
100ml lemon juice 

For the vegetables 
2 red onions, chopped roughly 
2 courgettes cut into chunks 
2 red peppers cut into chunks
3 cloves of garlic, chopped finely
2 tablespoons each of parsley and coriander 

For the pastillas 
2 tablespoons sultanas 
1 tablespoon toasted sliced almonds 
1 packet ready-prepared filo pastry (12 sheets or 6 bigger sheets that you've cut in half to make 12!)
Icing sugar and cinnamon, to dust

  • Chop up the chicken and marinade it in a bowl with all the other marinade ingredients.  Leave it for as long as you can! At least 30 minutes.  

  • Chop up the veggies and put them in a roasting dish.  Spray with a little olive oil, and sprinkle with a little water.  Season with freshly ground black pepper and roast in the oven at 180C for 30 minutes.  

  • Put your chicken and marinade into a hot pan and cook until the chicken is done.  Add the roasted vegetables, and the parsley and coriander.  

  • Lay out two sheets of filo pastry.  Add a couple of big spoonfuls of filling to the middle of the pastry.  Sprinkle a few sultanas and sliced almonds on the top. Take a pastry brush, and use a little water to brush all the way around the first layer. Fold the first layer over the filling.  Brush the outside of the second layer with a little water and fold this layer over too.  Brush the top of the pastilla with a little milk.  Lay on a baking sheet covered in greaseproof paper (that you've brushed with a little olive oil). 

  • Keep going until you've made six pastillas.

  • Bake in the oven at 190C for 15 minutes, or until they are nicely and lightly browned on the top.  

  • Plate up, and sprinkle with a little dusting of icing sugar and cinnamon for that sweet and savoury flavour.  

  • Serve with some green veggies - we went for peas and sliced green beans.  

Sunday 19 January 2014

wear | your ankle booties

Ankle boots. They are just my favourite shoe in the whole wide world. Can be practical, chic and sexy all at the same time. I find that every shoe dilemma  is answered  a minute before you leave the house by shoving your feet into the pair of ankle boots on the top of the pile. Does this happen to anyone else? I also find, that every time, whatever pair that happen to be at the top of the pile WORK WITH MY OUTFIT.

It's crazy. So this is why I decided to do this style post on ankle boots! In short, both Emily and I are suffering from a bit of an obsession with them, and as ankle boots are mostly worn in the autumn/winter time, why not? Here I show you five different ankle boots of mine and Emily's collection (!) and how I style them. I hope you like it!

Enjoy today!!

- rosinaviolets    x

THE BOOTS

NEXT

H&M

RIVER ISLAND

ZARA

DEICHMANN
Casual - NEXT


Sophisticated - ZARA


Relaxed - DEICHMANN


Flirty - RIVER ISLAND


Cool - H&M


make | MOROCCO | pea & winter greens tagine

Another tagine this week, although mellower, less bold flavours than before.  This has the comfort-factor too - when it's cold and you fancy something hearty for dinner, warm this up and you'll feel good in no time.  It's also very healthy, packed with veggies and super duper easy to cook.  We made this in between studying, all it takes is bung some things into a pot, go upstairs and hit the books, come back and bung some more things in, review what you were reading and hey presto - dinner's done.  It tastes super with some warm crusty bread (or toast if you're really skint!)

We're using spinach in this recipe, but you could use any finely shredded winter greens - kale, collards, beetroot greens, chard - anything would be good, and equally up your phytonutrient content!

Chickpeas are delicious - nutty, slightly buttery and they give you the carb hit we all want in winter without eating a plateful of pasta.  But they're also a great source of fibre, and protein if you're a vegetarian.  A little known fact about chickpeas - one cup will give you nearly 85% of your RDA of manganese, great for antioxidant defence and energy boosting.  They also have a high iron content, and, good news for us girlies, they have a phytochemical called 'saponin' which could be a factor in controlling the risk of breast cancer and osteoporosis.  Crack open those cans of chickpeas!!

Enjoy today!!

- rosinaviolets    x


Pea & Winter Greens Tagine 
400g drained weight chickpeas (2 tins) 
100g dry yellow split peas, soaked for 45 mins in water
75g sultanas, soaked for 20 mins in water 
1 large onion 
3 minced garlic cloves 
1 teaspoon ground cinnamon 
1 teaspoon cumin seeds 
1 teaspoon ground ginger 
1 teaspoon ground turmeric 
1/2 teaspoon (or more, or less, to taste) chilli flakes 
600ml vegetable stock 
350g frozen peas
half a bag of spinach (or other winter greens of your choice!) 
3 tomatoes, chunked 
1/2 bunch each of coriander & mint, chopped 

  • Soak the yellow split peas in water for around 45 minutes.  Soak the raisins for 20 minutes.  

  • Add a little stock to a large pan and get it hot.  Add the onion and garlic and steam fry in the stock for two minutes.  Then add the spices.  Give it a whiff - it'll be smelling brilliant! 

  • Add the rest of the stock, and bring it to the boil before adding the drained split peas.  Lower the heat until the mixture is simmering on the stove.  Leave it for about 45 minutes.  

  • Add the raisins to the pot, then the chickpeas and winter greens.  Leave for a further 10 minutes.  

  • Now add the frozen peas and tomatoes.  Bubble away for another 10 minutes (best not to leave it now as you don't want it to get too dry - add a little water if it starts to stick).  

  • Take the tagine off the heat and season to taste.  Sprinkle over the chopped herbs.  Serve in a bowl with some warm crusty bread.  

Sunday 12 January 2014

make | MOROCCO | chicken & fennel tagine

A tagine is basically a stew named after the traditional pot in which it's cooked.  The famous cone or dome shaped roof is designed to make sure all the condensation returns to the dish, to stop it from drying out.  You can make a tagine in any pot, though, and we did ours in the slow-cooker! (I know, not very traditional at all!) The traditional tagine includes lots of spices, including ginger, turmeric, cinnamon, cumin and saffron, and is served with lightly seasoned cous cous or bread.  

Our version uses a Moroccan staple - preserved lemons! You can make your own or use shop bought ones - we didn't have enough time to make our own (they take a month of marinating!) so we used the shop bought sliced preserved lemons you can also add to drinks.  They worked just fine, adding just the right amount of sour to balance out the other flavours.

This was the first time either of us had cooked with fennel!  It's delicious, and has a mildly aniseed-y flavour that complements the other flavours in this dish very well (if we do say so ourselves!)

We hope you enjoy this as much as we did!

Enjoy today
- rosinaviolets    x


Chicken & Fennel Tagine 
Feeds four people

For the spice mixture 
1 heaped teaspoon ground coriander seeds 
1 heaped teaspoon ground ginger 
1 level teaspoon cumin seeds 
salt & pepper to taste 
2 tablespoons water 

For the tagine 
500g chopped chicken breasts 
2 bulbs of fennel, topped & tailed & cut into eight wedges each.  
2 onions, chopped 
4 cloves of garlic, minced 
1 homemade preserved lemon, or 6 slices of shop bought preserved lemon (as in the picture above).  Make sure you de-seed them! 
50g chopped olives 
3 celery sticks, chopped finely 
1 carrot, chopped
1/2 yellow pepper, chopped 
500ml hot chicken stock 
half a bunch of coriander, chopped 
pinch of saffron 

For the cous cous 
225g cous cous 
300ml boiling water 
salt & pepper to taste 
chopped coriander 

  • Mix the ingredients for the spice mixture in a small bowl.  Put them in a big frying pan and let them get hot.  Then add the chicken and steam fry in the spice mixture, adding a little more water if it evaporates.  

  • Add the fennel to the pot with the onions, half the coriander, the celery and the garlic.  Cook for 5 minutes.  

  • Add the pepper, carrot, olives and lemon to the pot.  

  • Make the stock up and add a pinch of saffron to it.  Pour it into the pot.  

  • Either leave the pot on the stove for 1 1/2 hours, or put it in the slow cooker for the rest of the day! Top up with a bit of water if it starts to get dry.  

  • When you're ready to serve, add the boiling water to the cous cous and leave to sit for 5 minutes.  Fluff it up with a fork and serve the tagine on top of the cous cous, sprinkling the remaining coriander over the top.  

live | fundraising

My beautiful and inspiring friend Hayley Gill,
setting out for Cambodia later on this
year to make a change!
My friend from work, Hayley Gill, is undertaking an amazing project for FutureSense Foundation that we can all be inspired by!

We both work at a really lovely nursery, where the kids have the best environment - with tons of toys, loads of creative things to do, yummy food (& lots of it!) and a great outdoor area they can explore safely.  We are also privileged enough to be on the site of a five star hotel, so when we take the children on walks, they're surrounded by beautiful plants and landscaping, and lovely buildings.

Hayley has worked at other primary schools and nurseries in this country & having realised how lucky they are, and how other children don't get these kinds of chances, she's taken the enormous step of deciding to do something about it.  I think that's something we can all be inspired by.

She's going away to Cambodia later on this year for three weeks of volunteering for FutureSense Foundation - an organisation focused on providing poverty relief.  Their approach is reassuringly bottom-up - rather than giving money to the government and waiting for it to trickle down to the people who really need it (an enterprise requiring more faith in government than I have!), they go straight out into the field and tackle problems head on by improving education, child welfare and livelihoods.  By doing this, they give people the power to create a better life for themselves and break out of poverty.


Let's help make their schools as beautiful & inspiring as the
scenery.
Hayley's started her own website on JustGiving at: http://www.justgiving.com/Hayley-Gill2 so we can all help her out or just read more about what she's doing.  Check out this PDF for more information on the project: http://www.challengesabroad.co.uk/itinerary/asia-experience.pdf

If you want to donate, all the money is going towards helping others, and the website is totally secure and safe.

Even if you can't afford it, it's something worth thinking about - what causes are you passionate about?  It's made me realise how many times I've stated that something's wrong, or that I don't like the way something's being done, but I've not actually stood up and done something about it.

Be inspired by the fantastic opportunity Hayley's taking to change an injustice.  We're all as powerful as we decide to be - opportunities for change are all around us, we've just got to open our eyes and see them, and then take them.  Remember that you can do it - don't think other people who are more powerful, more influential, more 'go-getting' or more confident than you are more suited to the task - you can be the change you want to see in this world.

Let's all be inspired by Hayley's wonderful project.  Give whatever you can, or take the opportunity to think about what you'd like to do.

Enjoy today!!
- Emily    x

Monday 6 January 2014

make | MOROCCO | houmous

Happy 2014 everyone!

We are SO excited for the new year and can't wait to start blogging again.  This year, we thought we would take each month to explore a different country for our make posts.  This January, we are headed to Morocco!

Neither of us have ever been to Morocco, so we're using this month to do a little research into this exciting country.  Marrakesh, the capital, is supposedly a super-busy mash-up of spice, crowded markets, tiny alleys, and street vendors.  One thing that has always excited me about the town is the kind of explosion (or perhaps it would be more accurate to say fusion) of colours, cultures, and histories.  There's the Arab, African but also Spanish influence, as it's so easy to reach via the straits of Gibraltar.

The cooking is based around the communal fire or oven.  Families take their bread down there to bake and come back a few hours later to collect it.  Men sit with ovens where people drop off their tangias (the clay pots with the conical roof, used to cook stews called tagines).  Spices are really central to cooking, and Moroccan food uses loads of them on a regular basis.

We're excited to see what Moroccan food is all about and we hope you are too!

We've started off our culinary trip with a basic recipe for something everyone loves - houmous! Most houmous is made with a combination of tahini paste (ground up sesame seeds) and olive oil, but our version uses natural yoghurt instead of oil to make for a lighter dip.  We utilise one of our favourite spices - smoked sweet paprika - to give a slightly different flavour to our dip.  We think it's yummy, and we hope you do too!

Enjoy today!!

- rosinaviolets    x


Houmous
Makes the sort of amount you can buy in the shops!
Lasts as long as the yoghurt does, kept in the fridge, covered.

200g can chickpeas, drained (reserve the water)
2 cloves crushed garlic
1 tablespoon lemon juice
4 tablespoons natural yoghurt + 1 tablespoon water from the chickpea can
1/2 teaspoon (or less, to taste) salt
1 teaspoon tahini paste
1 teaspoon sweet smoked paprika
1/2 teaspoon (or more, to taste) freshly ground black pepper
  • This is probably the easiest recipe ever... Take all the ingredients, and put them in a blender.  Blend. 

  • Taste to see if you want to add more seasoning.  

  • Put in a dish and sprinkle some more black pepper on the top.

Done :)

Wednesday 1 January 2014

live | an assurance of love... from yourself

'From yourself?' I hear you ask. The answer is yes. Who else knows every memory, every thought you have, every dimension of you? The only person who knows these things is you, so really, doesn't that mean that the only person who could really make a judgement about you is you?

Take some time to think about that. You, and only you, are capable of judging you.  

I'm writing this post today because the beginning of a new year sees millions upon millions of us across the world taking the opportunity to make goals to better ourselves, in a list titled 'New Years' Resolutions'. Have you made yours yet? I wrote mine the other day and something struck me so directly that I felt the whole population on this earth should be struck with it too. 

And it's this. 

How are you ever going to start achieving and striving towards becoming an improved you, if you cannot find any good in yourself at all? You may tell me that if you're wishing to be better, you have obviously been searching for areas in yourself which are flawed or not how you want to be. And certainly you might be correct. But the way I see it, and the way I have observed in others and in myself, is that it is an absolute necessity for you to accept and love yourself in your current state in order for you to change yourself. And suddenly, once you feel happy in your own skin because you love it - you do change.

This is not about making yourself think that the bad things you have done or said or thought were not bad, because everyone does and says and thinks bad things to some degree and at some point in their lives. This is about accepting you for you, and learning to love yourself, because these bad things have given you the chance to change yourself. Every defect and flaw of your personality, your body, your situation in life, anything - has nourished you with the sustaining strength to make yourself a better person. Just think, all these 'bad' things, they can benefit you! All this time you were thinking they were bringing you nothing but pain and anger, and now they are going to bring you long lasting happiness!  They give you the strength to turn around, and manifest whatever you want.  


This is why dwelling over everything you hate about yourself gets you nowhere at all. Why would you tell yourself over and over that you hate yourself? Just try to think of one reason why this might be worthwhile.

That's right, there is none!

There is nothing whatsoever to be gained from telling yourself you are a horrible person. So, you said something really mean and wish you could take it back. Well, you did it, you can't change the past, it's already happened. It's been and done and that's it. What you can do, is think about now. What are you going to do now to make sure it doesn't happen again? Every time you do something you regret, ask yourself 'what is the point in this regretting?'. Once you realise that the answer is 'there is no point' every time, and you can be thankful the incident happened so you can make yourself better, you are making steps towards your goal. 

I hope that next time you reflect upon something you think is 'bad' that you have said or done, or hate yourself for a defect in your appearance, maybe it's while you are writing your New Years' Resolutions today - you will remember the one truth that's universally true, and the one thing that surpasses all judgement;

I am beautiful, I am the product of nobody's judgement but my own, and I love myself for everything I do, and everything that I am. 

There is no time like the present.

Enjoy today!!
sarah    x